Sunday, October 28, 2012

Crock Pot mashed potatoes


Who knew you could make mashed potatoes in a slow cooker. I didn't. But then I saw a recipe on Pinterest, tried it and may never make mashed potatoes the traditional way again.

CROCK POT MASHED POTATOES

5 Pounds of Russet Potatoes
1 garlic clove minced
14.5-oz. can chicken broth
1/4 cup butter, cut into small cubes chunks
6-oz. container cup plain yogurt
1/4 teaspoon ground black pepper
1/3 cup milk, warmed
2 ounces of light cream cheese

Chop potatoes into 1-inch cubes or smaller. (I don't peel mine, but I'm weird like that, some people may prefer to).

Place potatoes, chicken broth and butter into the slow cooker. Cover, and cook on high for about 4 hours. (If you're around, you can turn it to low after the first 2-3 hours).

Stir potatoes. This should make them fall apart as if mashed. Add the other ingredients, stir som more and enjoy!

Famous brownies


These brownies really are famous, but their fame has absolutely nothing to do with me. I'm just copy-catting the recipe.

A woman in Great Falls frequently makes these brownies and gives them to all kinds of different causes. She's dropped them off at the Tribune before. Once I was offered some at the police station (I was there for work) and they were even served during the 100-mile bike ride I did over the summer. Else where in the world, these might be known as mint brownies or perhaps grasshopper brownies. Here in Great Falls, they're known as so-and-so brownies. (I'll leave her name out of it, but she's a very nice woman who makes delicious brownies).

We've published her recipe many times in the Tribune. I've made a similar recipe before, but I wanted to try the true so-and-so brownies. I didn't stick to the recipe entirely, since I made them gluten-free, but I they turned out well sans gluten.

SO-AND-SO'S FAMOUS BROWNIES

1 cup sugar
1/2 tsp. salt
1/2 cup butter, softened
16-ounce can chocolate syrup
4 eggs, beaten
1 tsp. vanilla
1 cup flour
1/2 cup nuts (optional)
Combine sugar and butter. Add eggs and mix well. Add flour, salt, syrup, vanilla and nuts. Mix until combined. Bake in greased and floured 9- by 13-inch pan at 350° for 30 minutes. Do not overbake more than two or three extra minutes. Allow brownies to cool completely. Frost, and then glaze.
FROSTING
2 cups powdered sugar
1/2 tsp. peppermint extract
1/2 cup butter, softened
2 or 3 drops green food coloring
2 tbsp. milk
Combine sugar, butter, milk, peppermint extract and food coloring. Frost cooled brownies.
GLAZE
1 cup chocolate chips
6 tbsp. butter
Melt chocolate chips and butter over low heat. Let cool slightly, and spread over cooled, frosted brownies.

Saturday, October 13, 2012

It must be fall


I tried to keep up with this blog over the summer, but somehow I just never found time to update it.

I was still cooking, and maybe at some point I'll find the time to post some of those recipes. But rather than trying to play catchup, I'll just start where I am now.

Fall is my favorite time of year. I love the changing colors, the crisp air and I especially love fall food.


Today I baked three pie pumpkins for my first attempt at making my own pumpkin puree. I have big plans for my pumpkin puree, including curry, soup and perhaps a breakfast dish. In fact I'm planning to write a food page article for the Tribune about my pumpkin experiments.

Roasted pumpkin seeds

I started playing with pumpkin early. I needed to bring dessert to a dinner party and I hadn't yet made my puree, so I bought some and tried a pumpkin dump cake. Dump cake is my all time favorite camping dutch oven dish. Dump cake really can only be made in a dutch oven (by dumping a can of pie filling, a bag of cake mix and soda or butter over the top and baking it in the fire). So I'm calling this recipe pumpkin cobbler. (See below).

The recipe calls for a small can of pumpkin, but I could only find large ones, so I saved half and used it today to make pumpkin pie filling. (I make it without the crust and cut back on sugar, so it's almost a vegetable dish that way, right?)


That put me in the mood for cranberries, which I happened to have in the freezer, saved from last winter in case I was desperate for cranberries at some point over the summer. (I just followed the recipe on the bag).

Pumpkin Cobbler

(Found on Pinterest and adapted from The Picky Apple)

Ingredients:

1 box yellow cake mix (I used gluten free)
1 can (15 oz) pumpkin puree
1 can (12 oz) evaporated milk
3 large eggs
1/2 cups sugar
1 tsp. cinnamon
1/2 tsp. salt
1/2 cup butter

Heat oven to 350 degrees. Grease bottom of 9-by-13-inch pan.

Mix pumpkin, milk, eggs, sugar, cinnamon, and salt. Pour mixture into greased pan.

Sprinkle dry cake mix over pumpkin mixture.  Slice butter over cake mix. Bake 50-55 minutes.

Sunday, July 15, 2012

Peanut-y noodles

I'm so far behind on posting recipes here.

I've been doing a lot of cooking lately, much of it with my fresh veggies from the CSA farm.

This dish was my first time using bok choy. It was adapted from a recipe included in our weekly farm newsletter. The recipe was for a cold noodle salad, but I used it to make a hot pad Thai-type dish.


THAI PEANUT NOODLES WITH BOK CHOY
8 oz Pad Thai noodles
1 head/bunch of bok choy
1 bell pepper, thinly sliced
2 medium carrots chopped
4-5 green onions sliced
1/2 cup chopped cashews
For the sauce:
1/2 cup peanut butter
1 lime, juiced and zested
2 teaspoons sesame oil
1 tablespoon seasoned rice wine vinegar
2 tablespoon soy sauce
3 tablespoons honey or molasses
2 cloves garlic, roughly chopped
1/2 cup roughly chopped cilantro (stems and all)
2-3 teaspoons curry powder
2-4 T water

Soak noodles as directed on the package.

In the meantime, chop up the veggies and make the sauce.

For the sauce: Put the ingredients in the blender and blend, or, just mix by hand. (Use warm water to help soften the peanut butter.)

In a large wok, stir fry the bok choy. Add the other vegetables. When the noodles are done soaking, add them to the wok. Pour the sauce into the mix and stir fry everything until the noodles are soft.

Tuesday, June 19, 2012

Rhubarb Cake


The original recipe that inspired this cake was actually a recipe for a strawberry cake, but when I saw the picture on Pinterest, I assumed it was rhubarb.

The strawberry version, I'm sure, is delicious, but I decided to try it with rhubarb since I've got lots of that growing in my garden.

My recipe looked something like this:

RHUBARB CAKE

1 cup (2 sticks) butter, softened
2 1/4 cups sugar, divided
3 eggs
3 tablespoon lemon juice, divided
Zest of 1 lemon
2 1/4 cups gluten-free flour (I used a flour mixture from Williams-Sonoma)
1/2 teaspoon baking soda
1/2 teaspoon xanthan gum
1/2 teaspoon salt
8 oz. plain yogurt
About 2 cups rhubarb, diced
1 cup powdered sugar

Preheat oven to 325. Grease and flour a 10 inch Bundt pan.

Sift together the flour, baking soda and salt. Mix in the lemon zest and set aside.

With an electric mixer, cream together the butter and 2 cups sugar until light and fluffy. Beat in the eggs one at a time, then stir in 1 tablespoon lemon juice.

Alternate beating in the flour mixture and the yogurt, mixing just until incorporated.

Toss the rhubarb with the remaining 1/2 cup of sugar. Gently mix into the batter.

Pour the batter into the Bundt pan. Bake in the preheated oven for 60 minutes, or until a toothpick inserted into the center of the cake comes out clean.

Allow to cool at least 20 minutes in the pan, then turn out onto a wire rack and cool completely. Once cooled whisk together the remaining 2 tablespoons of lemon juice and the powdered sugar. Drizzle over the top of the cake.

Saturday, June 9, 2012

Cauliflower pizza


A friend at work gave me this recipe. She said it was a great way to make an easy, gluten-free pizza crust.

I was a little skeptical when she said the crust was made from cauliflower, but it really is a good recipe. Not only does the crust contain cauliflower, but there's also cheese baked into it, which makes it gooey and delicious. I was worried about the crust holding together, put it really does -- maybe not enough to pick up a slice of pizza and eat it, but it worked just fine with a fork and knife.

I highly recommend this one:

CAULIFLOWER PIZZA CRUST

1 cup cooked, riced cauliflower (directions below)
1 cup shredded mozzarella cheese
1 egg, beaten
1 tsp dried oregano
1/2 tsp crushed garlic
1/2 tsp garlic salt

To "Rice" the Cauliflower:

Take 1 large head of fresh cauliflower, remove stems and leaves, and chop the florets into chunks. Place in food processor and pulse until it looks like grain.

Place the riced cauliflower into a microwave safe bowl and microwave for 8 minutes.

(One large head should produce approximately 3 cups of riced cauliflower. The remainder can be used to make additional pizza crusts immediately, or can be stored in the refrigerator for up to one week. I chopped up my left-over cauliflower and roasted it in the oven with some olive oil and garlic. Yum!)

To Make the Pizza Crust:

Preheat oven to 450 degrees. Spray a cookie sheet with non-stick cooking spray.


In a medium bowl, stir together 1 cup cauliflower, egg and mozzarella. Add oregano, crushed garlic and garlic salt, stir.

Transfer to the cookie sheet, and using your hands, pat out into a 9" round.

Bake at 450 degrees for 15 minutes.


Remove from oven. To the crust, add sauce, toppings and cheese. Place under a broiler at high heat just until cheese is melted (approximately 3-4 minutes).


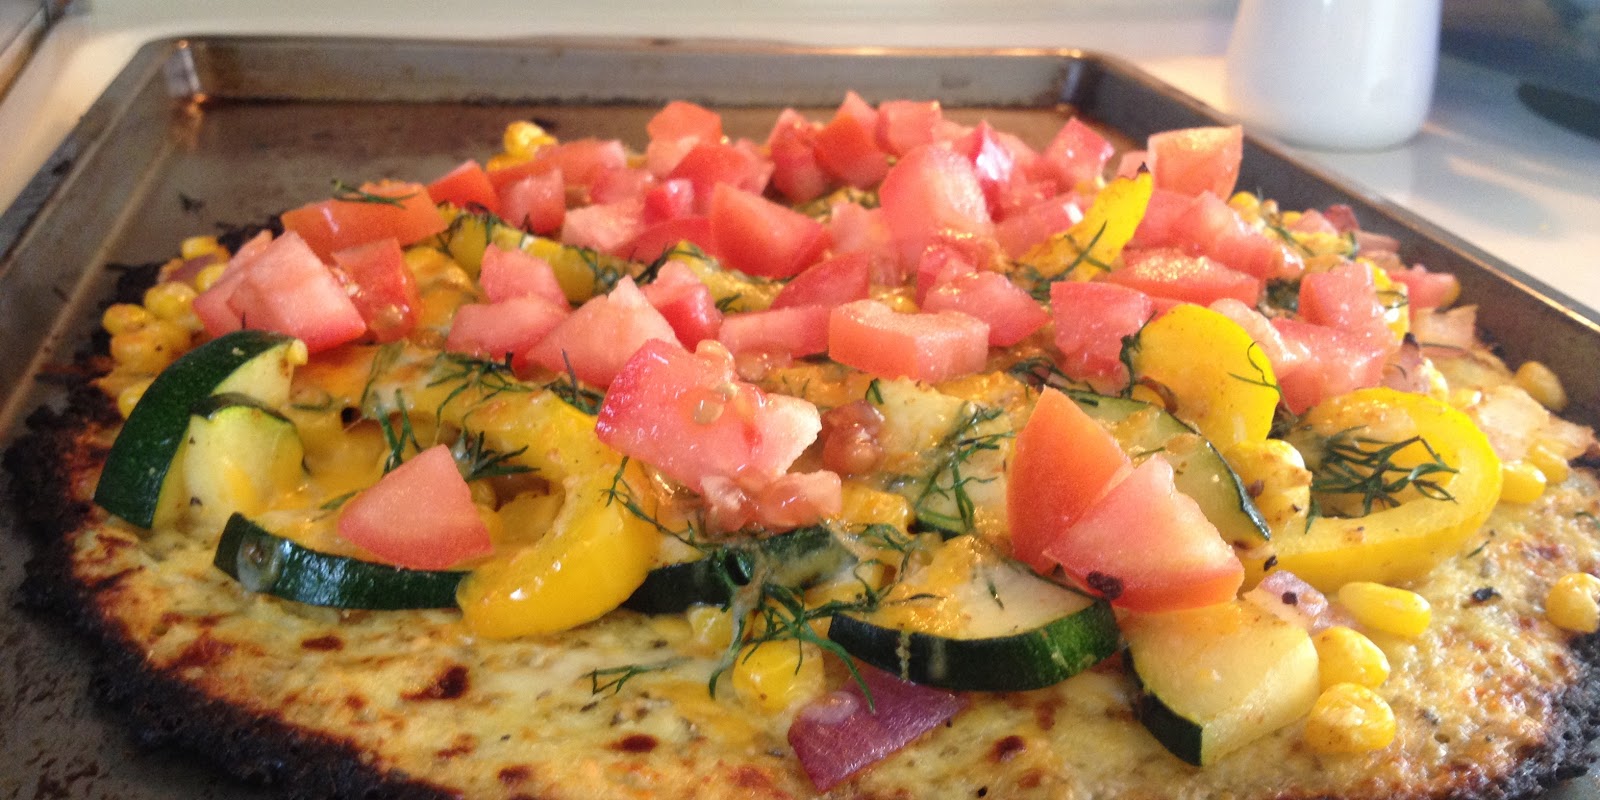
The inspiration for my toppings came from something I found on Pinterest. I skipped the poblano pepper, and instead sauteed zucchini, corn, garlic and red onion. (I didn't add the milk or egg or anything). I also added some sliced yellow pepper and topped it all with fresh dill and cheddar cheese. After the pie came out of the oven, I added some chopped tomatoes. Good stuff!

The veggies have arrived

On Friday, I picked up my second batch of farm-fresh vegetables.

This summer I signed up for a CSA share from a near-by farm. If you're not familiar with Community Supported Agriculture, the basics of it are people buy shares of a farm and then throughout the growing season receive vegetables as they come in to season.

Our first two shipments of vegetables have been mostly salad greens with some kale and chard. Last week I ate all my veggies as fresh salads, and I'll likely do the same this week.

A while back I decided to quit buying salad dressing. Basically, I was in the store, reading the ingredients on a bottle, checking for gluten, and decided store-bought dressing has way too  many ingredients in it to be healthy, plus it's expensive. I'd rather just drizzle a little oil and vinegar on my salad.

Recently though, I've started experimenting with making my own salad dressing. This week's newsletter from the farm included this salad dressing recipe, which I can promise is delicious.


DILL DRESSING

3/4 cup plain yogurt
2 tablespoons red wine vinegar
2 tablespoons lemon juice
1 tsp paprika
2-3 garlic cloves, minced
1 bunch dill, chopped

Mix all ingredients together. Enjoy on salad or as a dip.

The dressing recipe came with this salad recipe, which I haven't tried yet, but look forward to:

GREEK GREENS SALAD

1 large head or bag of lettuce
1 can black olives, halved
1/2 to 1cup crumbled feta cheese
1 cup shredded kale
1 cup shredded chard
3-5 green onions, chopped (or a 1/2 a red onion thinly sliced)
1 can or 2 cups cooked garbanzo beans and/or
2-3 chicken breasts, marinated with Greek marinade, grilled, then sliced and placed on top of salad (optional)

Homemade spaghetti sauce


A couple weeks ago I wrote a story about how much sodium we, as Americans, eat.

I try very hard to eat a healthy diet. Part of that is limiting how much packaged food I eat. Because I don't eat gluten, a lot of packaged food is out anyway. But as I was reporting my sodium story, I realized one spot I could probably cut back on my salt in take is canned spaghetti sauce. It's not like I eat it every day, but I usually have a jar or two in the pantry because it makes a quick easy meal.

I was telling my mom about all this, and she suggested making a batch of this recipe from Cooking Light. It makes a bunch of marinara sauce, which I then froze in smaller quantities -- pretty much like having a jar of sauce in the cupboard.


BASIC MARINARA SAUCE

3 tablespoons olive oil
3 cups chopped yellow onion (about 3 medium)
1 tablespoon sugar
3 tablespoons minced garlic (about 6 cloves)
2 teaspoons salt
2 teaspoons dried basil
1 1/2 teaspoons dried oregano
1 teaspoon dried thyme
1 teaspoon freshly ground black pepper
2 tablespoons balsamic vinegar
2 cups fat-free, less-sodium chicken broth
3 (28-ounce) cans no-salt-added crushed tomatoes (I couldn't find crushed, so I used diced and one can of sauce)

Heat oil in a large pot oven over medium heat. Add onion; cook 4 minutes, stirring frequently. Add sugar and next 6 ingredients (through black pepper); cook 1 minute, stirring constantly.

Stir in vinegar; cook 30 seconds. Add broth and tomatoes; bring to a simmer. Cook over low heat for 55 minutes or until sauce thickens, stirring occasionally.

Friday, June 8, 2012

Cheesecake bars


I made these cheesecake bars one time last summer and decided to make them again recently for a friends birthday.

The recipe, from Cooking Light, calls for fresh cherries, which are used to make what is basically a jam. I decided to skip that step and just buy some jam instead. Last time I used blackberry jam, but this time I found cherry jam and used that instead. Here's the original Cooking Light recipe, and here's my version:

CHEESECAKE BARS

4 1/2 ounces gluten-free flour mixture (about 1 cup. I used sorghum, brown rice and tapioca)
3 tablespoons powdered sugar
1/8 teaspoon salt
5 tablespoons chilled butter, cut into small pieces
3 1/2 teaspoons ice water
3/4 cup (6 ounces) 1/3-less-fat cream cheese
1/3 cup fat-free plain Greek yogurt
1/3 cup granulated sugar
1/2 teaspoon vanilla extract
1 large egg
Cherry or other flavored jam (about one small jar, depending on how much you like)
Preheat oven to 350°.

Line an 8-inch square glass or ceramic baking dish with parchment paper. (I use a small rectangular glass pan).

Place flour, powdered sugar, and salt in a food processor; pulse 2 times to combine. Add chilled butter, and drizzle with ice water. Pulse 10 times or until mixture resembles coarse meal. Pour the mixture into prepared baking dish (mixture will be crumbly). Press mixture into bottom of dish.

Bake at 350° for 23 minutes or until lightly browned. Cool completely. Reduce oven temperature to 325°.

Place cream cheese and remaining ingredients in food processor; process until smooth.

Spoon cream cheese mixture over cooled crust; spread evenly. Dollop cherry mixture over cream cheese mixture, and swirl together with a knife.

Bake at 325° for 36 minutes or until set. Cool on a wire rack. Cover and chill at least 3 hours.

Theses are good bars. My only problem with them is that I can't get them to turn out too pretty. I don't like to serve them in the pan because of the parchment paper, but I think they look kind of messy all cut up on a plate. (That's why there's no picture). Oh well, at least they taste good.

Sunday, June 3, 2012

Wedding shower tea party: Chicken salad cups


My Aunt Barb found this Cooking Light recipe for chicken salad. (We're a Cooking Light family). We made a few tweaks and ours looked something like this:

CREAMY CHICKEN SALAD

1/2 cup light mayonnaise
1/2 cup plain fat-free Greek yogurt
1 tablespoon fresh lemon juice
1 tablespoon white wine vinegar
1 tablespoon Dijon mustard
1 teaspoon honey
1/2 teaspoon kosher salt
1/2 teaspoon freshly ground black pepper
1/3 cup chopped celery
1/3 cup red grapes, halved
7 tablespoons (about 2 ounces) coarsely chopped almonds
One head butter leaf lettuce


Poach the chicken in a dutch oven or large frying pan. Once cooked through, allow chicken to cool completely.

Wedding shower tea party: Flower cupcakes


Yet another Pinterest recipe.

The inspiration photo
Actually, it was just a photo - no recipe attached to it, but I thought it was perfect for a party where we were giving out potted flowers as party favors.

I asked Emily what kind of cupcakes she would like and she thought chocolate zucchini would be fitting. We used this recipe from my Aunt Bettsy:


CHOCOLATE ZUCCHINI CAKE


1/2 cup margarine
1/2 cup cooking oil
1 3/4 cup sugar

Cream these together.  Add:

2 eggs, slightly beaten
2 cups grated zucchini
1 tsp vanilla
1/2 cup sour milk
1 tsp baking powder
1 tsp baking soda
4 Tbsp baking cocoa
1 tsp cinnamon
1 tsp salt
2 1/2 cups flour


Fill muffin cups, lined with paper liners, about 2/3 full.

Bake at 350 for about 20 minutes. Allow to cool completely before frosting.


The frosting recipe came from good ol' Betty Crocker:

CHOCOLATE BUTTERCREAM FROSTING

3 cups powdered sugar
1/3 cup stick margarine or butter, softened
2 tsp vanilla
3 ounces unsweetened baking chocolate, melted and cooled
2-3 Tbsp milk

Mix all ingredients except milk in bowl.  Stir in milk until smooth and spreadable.


The hardest part of the project was finding green candy for the flower's leaves. We ended up buying just about every kind of green candy we could find. I think what worked best though, was Apple O's, cut into quarters.

For the flowers, we did a mixture of lollipops (I wanted Dum-Dums, but could only find Blow-Pops) and salt water taffy inserted on a lollipop stick.

Wedding shower tea party: fruit salad

Cooking Light photo
Doesn't that look good?


I found this recipe on Pinterest also. It had some kind of funky ingredients for a fruit salad (basil and olive oil), but the photo just looked so good. Plus, it was a Cooking Light recipe, and Cooking Light never leads me astray.

PEACH, STRAWBERRY AND BASIL SALAD

1 cup fresh orange juice
1 1/2 tablespoons sugar
1 1/2 tablespoons champagne vinegar or white wine vinegar
1 tablespoon extra-virgin olive oil
Dash of salt
1 package fresh blueberries 
1 pound fresh strawberries, halved
large ripe peaches or nectarines, cut into wedges
1/4 cup small fresh basil leaves, chopped 


Combine the first 3 ingredients in a small saucepan; bring to a boil. Cook, uncovered, until reduced to 1/2 cup (about 25 minutes). Add oil and salt to pan, stirring with a whisk. Let stand 2 minutes.

Combine berries and peach in a large bowl. Add juice mixture, stirring gently. Sprinkle with basil.

Tuesday, May 29, 2012

Wedding shower tea party: avocado chickpea sandwiches

The sandwiches are in the foreground

For tea sandwiches, we made the traditional cucumber, with cream cheese and dill, but I also wanted to try this Smashed chickpea and avocado salad sandwich (that I also found on Pinterest).

I doubled the recipe, which resulted in way too much filling, so here's the original-sized version:

Smashed Chickpea & Avocado Salad Sandwich

1 (15 ounce) can chickpeas or garbanzo beans
1 large ripe avocado
1/4 cup fresh cilantro, chopped
2 tablespoons chopped green onion
Juice from 1 lime
Salt and pepper, to taste
Bread of your choice (we used some gluten-free and some sourdough oatmeal)
Rinse and drain the chickpeas.

In a food processor, blend the chickpeas and avocado. Add in cilantro, green onion, and lime juice. Season with salt and pepper, to taste.

The filling


Spread salad on bread. Cut off crusts and cut into triangles, squares or rectangles.

Wedding shower tea party: scones

Emily's a scone a fan.

I asked her what her favorite kind is and she said chocolate chip.

I've only made scones a couple times before and never chocolate chip scones, but I found this recipe from King Arthur Flour on Pinterest. We made a gluten-free and regular version. Both were keepers. We also added dried cherries to one batch.

This is the recipe, straight from King Arthur:

CHOCOLATE CHIP SCONE NIBBLES

Scones:
2 3/4 cups all-purpose flour
1/3 cup sugar
3/4 teaspoon salt
1 tablespoon baking powder
1/2 cup cold butter, cut in pats
1 cup to 2 cups mini chocolate chips, or finely chopped semisweet or bittersweet chocolate
2 large eggs
2 teaspoons vanilla extract
1/2 cup to 2/3 cup half and half or milk

Glaze:

3 1/2 cups confectioners' sugar
7 tablespoons water, enough to make a thin glaze
1 teaspoon vanilla

In a large mixing bowl, whisk together all the dry ingredients.

Work in the butter just until the mixture is unevenly crumbly; it's OK for some larger chunks of butter to remain unincorporated.

Stir in the chocolate chips.

In a separate mixing bowl, whisk together the eggs, vanilla and 1/2 cup milk.

Add the liquid ingredients to the dry ingredients and stir until all is moistened and holds together. Stir in additional milk if the dough seems dry, and doesn't come together.

Scrape the dough onto a well-floured work surface. Pat/roll it into an 8" to 8 1/2" square, a scant 3/4" thick. Make sure the surface underneath the dough is very well floured. If necessary, use a giant spatula to lift the square, and sprinkle more flour underneath.

Cut the square into 2" squares; you'll have a total of 16 small squares. Now, cut each square in half diagonally, to make 32 small triangles. (We didn't cut ours quite this small. I think we ended up with 16, rather than 32, which was still made for a smaller scone). A pizza wheel works well for this.

Transfer the scones to a parchment-lined or well-greased baking sheet.

For best texture and highest rise, place the pan of scones in the freezer for 30 minutes, uncovered. While the scones are chilling, preheat the oven to 425°F.

Bake the scones for 19 to 20 minutes, or until they're golden brown. Remove the pan from the oven, and allow the scones to cool right on the pan. When they're cool, cut each scone in half once again, to make a total of 64 tiny triangles.

Make the glaze by stirring together the sugar, water, and vanilla. If the sugar seems particularly lumpy, sift it first, for an extra-smooth glaze.

To coat scones, you can dip each one individually, which is quite time-consuming. Or line a baking sheet (with sides) with parchment, and pour about half the glaze atop the parchment. Set the scones atop the glaze, swirling them around a bit to coat their bottoms. Then drizzle the remaining glaze over the top. Use a pastry brush to brush the glaze over each scone, to coat it entirely. The glaze is very thin, so this is easily done. (King Arthur has some nice photos showing how this is done).

Transfer the scones to a rack set over parchment, to catch any drips.

Allow the glaze to set before serving the scones.

Showering my amazing sister

The shower was in the historic Astor House in downtown Golden
I somehow fell way behind on my blog, but I will make up for it with a slew of entries.

Hard at work in the kitchen

I just got back from throwing a wedding shower for my beautiful, amazing sister. I flew to Colorado Thursday, spent pretty much all of Saturday and Sunday in the kitchen with my mom, aunt and cousin, and then put on the party Sunday.

We got plants and decorated them with fabric for party favors

It was so much fun -- the party and the preparation.

The spread

We made a tea-party spread, complete with tea sandwiches, scones, biscotti and cupcakes.

Guests wrote marriage advice on index cards and put them in this lantern

We tried a ton of new recipes, which I will share in the next several posts.

The guest of honor

Tuesday, April 24, 2012

Quick and easy homemade salsa

Making homemade salsa makes me feel very Martha Stewart-esque. It's one of those things that comes so readily pre-prepared, and I just feel like such a homemaker when I make it myself. Even if it is incredibly easy to make.

I had never made salsa until about a year ago, and I guess the excitement of it has yet to wear off.

I whipped up this batch last week for book club.


EASY HOMEMADE SALSA
1/2 onion, chopped
3 or 4 jalapeño peppers, de-seeded and chopped (and when I say chopped, I don't mean finely chopped, chunked might be a better word because it all goes in the food process)
Lots of garlic (depending on how much you like garlic)
1 chipotle pepper from a can (I only throw this in if I happen to have some in the fridge, usually left over from something else)
Juice from 1/2 lime
Cilantro (as much or as little as you want)
2 cans diced tomatoes, drained (or fresh tomatoes when they're in season)

Put all ingredients in the food processor. Pulse a few times. Scrape down the sides of the bowl with a spatula and pulse a few more times.

Feel good about yourself for making homemade salsa and enjoy!

Saturday, April 21, 2012

A very cheery cake


I've never been a Peeps fan, but when I came across this cake on Pinterest I just had to try it.

I made it earlier this week for my book club friends. And while it turned out quite cute (if I do say so myself), it was incredibly easy to make.

SUNFLOWER CAKE

1 gluten-free cake mix
1 jar chocolate frosting
20 yellow chick Peeps
Chocolate chips

Bake the cake as directed. Allow it to cool completely.

Frost the cake.

Keeping the Peeps attached to each other, arrange them around the edge of the cake.

Arrange the chocolate chips in the center to look like sunflower seeds. (I went all out and had three different sizes of chocolate chips, staring with the largest around the outside and progressing inward to the smallest).

Note: Gluten-free cake mixes usually make one 8- or 9-inch round cake. Normal cake mixes make two. The original recipe (http://www.tasteofhome.com/Recipes/Peeps-Sunflower-Cake) says to make two round cakes and use two jars of frosting to layer the cakes/frost the outside.

Monday, April 16, 2012

A unique blend of flavors

This recipe was a recommendation from my mom. She found it in Sunset magazine and said I had to try it.

I cooked it up for dinner last night, and my mom was right. It is delicious. I really like the unique flavor blend of the orange zest and the spicy cayenne pepper. It's a unique dish and I definitely recommend it.


Chicken, Quinoa and Olive Stew

4 cups water
2 chicken breasts
2 tablespoons extra-virgin olive oil
1 large yellow onion, chopped
1/2 teaspoon salt
1 teaspoon ground cumin
1 teaspoon ground coriander
1 teaspoon dried oregano
3 garlic cloves, minced
1/2 teaspoon ancho chile powder
1/2 teaspoon cayenne
1 can fire-roasted diced tomatoes
2 teaspoons orange zest
1/2 cup quinoa
1 cup cooked chickpeas (garbanzos), rinsed if canned
1 cup black olives (the recipe calls for pimiento-stuffed small green olives, but I'm just not a fan of those).

Bring water to a simmer in a large, heavy-bottomed pot over medium-high heat. Add chicken and lower heat to a simmer. Cook chicken, covered, 15 to 20 minutes, or until cooked through; transfer to a plate. Pour broth into a large bowl and set aside. Wipe out pot.


Add oil, onion, and salt to pot and cook over medium heat until onion softens and is starting to brown, about 10 minutes.

Stir in cumin, coriander, oregano, and garlic; cook 2 minutes. Add ancho chile powder, cayenne, tomatoes, reserved broth, orange zest, and quinoa. Reduce heat and simmer, covered, until a white ring appears around each quinoa seed, 10 to 15 minutes. Meanwhile, shred chicken.

Add shredded chicken, chickpeas and olives and heat through.

Sunday, April 15, 2012

Gardens and compost

Saturday I went to a workshop hosted by Gardens from Garbage, a local Great Falls group that does some cool stuff.

The workshop (or at least the part I attended) focused on gardening and composting. I left and got straight to work on my garden and my first attempt at composting.

The first contents of my compost bin

The composting technique I learned about is called cold composting and it sounds so much easier than regular composting. Basically you put your food scraps in a 5-gallon bucket, add some enzymes, let the enzymes do their work and then bury the scraps in the garden. (Here are more detailed instructions from Gardens from Garbage).

Bokashi is wheat germ and enzymes that helps compost break down

I made a cozy home under my kitchen sink for my 5-gallon bucket. So far I've only composted a couple banana peels, some coffee grounds and an onion skin, but at least it's a start. And hopefully come garden time I'll have some nutrient-rich compost to add to my vegetable garden.

The beginning of my vegetable garden

Speaking of my vegetable garden, I got started on that this weekend too. I planted some tomatoes, peppers, and winter and summer squash in starter containers in the house. I've never started plants from seeds (I've never really done much gardening at all before) and I'm curious to see how it will go. I've been checking my seeds pretty much every few hours to see if any little sprouts have appeared above the dirt. Hopefully that watched-pot concept doesn't apply to plants.

Just in case that wasn't quite enough, I also today arranged with some friends to go in on a community-supported agriculture share, so this summer I should have plenty of fresh vegetables to enjoy. (Even if my garden is a complete flop, which is a very real possibility).

Future tomatoes, peppers and squash

Saturday, April 7, 2012

Blondies

This recipe is one of the first treats my mom made and sent me after I went gluten free, and it's still one of my favorites.

These bars are gooey with a good flavor (and super easy to make).

My mom found the original recipe on celiac.com. Here's my version:


GLUTEN-FREE BLONDIES

1/2 cup butter
2 cups packed brown sugar
3 eggs
1 teaspoon vanilla
1 1/2 cups gluten-free flour (I used a mix of sorghum, rice and tapioca)
3/4 teaspoon xanthan gum
2 teaspoons baking powder
1/2 teaspoon salt
2 cups of some combination of chopped dates, chopped nuts, chocolate chips, butterscotch chips or white chocolate chips (I used 1 cup each of dates and white chips)

Preheat over to 350.

Cream margarine and brown sugar together. Add eggs and vanilla and beat until light.

Combine flour, xanthan gum, baking powder and salt. Mix well.

Add the flour mixture to the egg/butter/sugar mixture and blend at low speed.

Stir in dates/nuts/chips.

Spread batter into a greased 9-by-13-inch pan.

Bake for 25 to 30 minutes. Cool before cutting into bars.

Sunday, April 1, 2012

Gluten-free granola

Gluten-free cereal is really expensive. I have a rule that I'll only buy it on sale. Usually I can find it marked-down often enough, that I nearly always have a box around. But lately there have been no sales to be found, so I've been going without cereal.

That's why today I decided to try making my own granola. I used a recipe from Cooking Light that I had made once before for Christmas gifts, but this time I made some pretty substantial changes to it.


CHERRY ALMOND GRANOLA

2 cups millet
1 cup buckwheat groats
1/2 cup ground flaxseed
1/2 cup chopped slivered almonds 
1 cup coconut
1  tablespoon ground cinnamon
1/2 cup pomegranate-cranberry juice (that's what I had in the fridge. The recipe calls for orange juice)
1/3 cup honey
1/4 cup packed brown sugar
2 teaspoons canola oil
1 teaspoon almond extract
1 cup dried cherries
Preheat oven to 300.


Combine the first six ingredients (millet through cinnamon) in a large bowl.

In a sauce pan, combine juice, honey, and brown sugar. Heat over medium heat until sugar dissolves, stirring frequently. Remove from heat; stir in oil and almond extract.

Pour the honey mixture over the grain mixture, stirring to coat.


Spread the mixture in a thin layer onto a jelly-roll pan coated with cooking spray. Bake at 300° for 10 minutes; stir well. Bake another 15 minutes and stir. Repeat this process until the granola turns golden brown. (This may take a while. I got impatient and turned up the oven, which resulted in burnt granola).

Allow granola to cool, then break it into chunks and place in a bowl. Add cherries and mix.


Even though, I burned my granola, I think it's super tasty. This recipe is definitely a keeper, although I'm not sure it's any less expensive than buying full-priced cereal.